Step 1: Log in webpage LingChat management background #
- Log in the webpage to authorize store interface and configure the robot
Link:https://lingchat.3win.ai/login

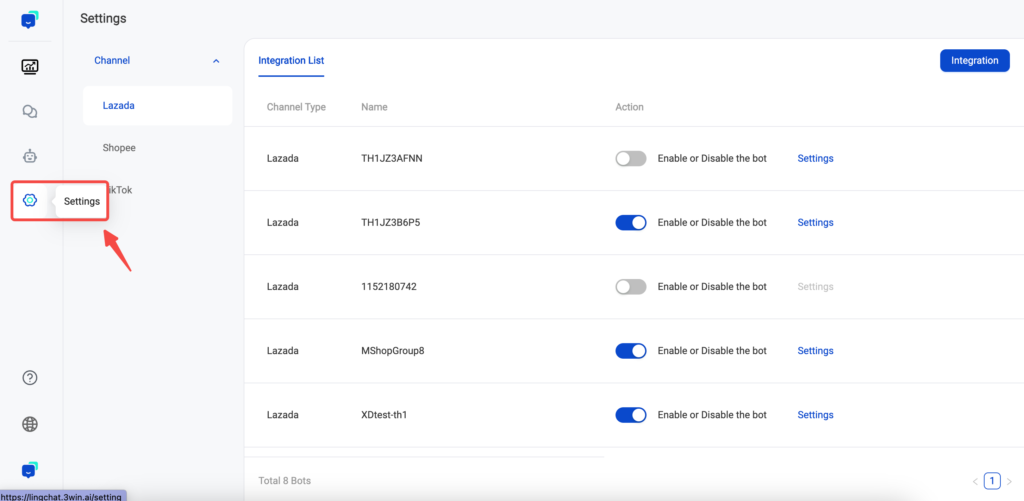
Step 2: Enter setting – channel connection page #
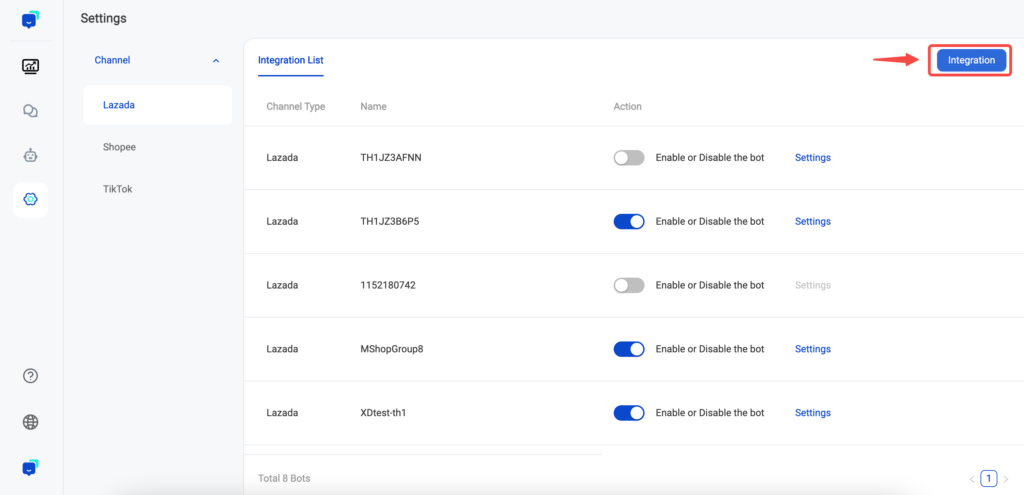
Step 3: Click connection channel #
- Complete authorization of corresponding robot message interfaces of store
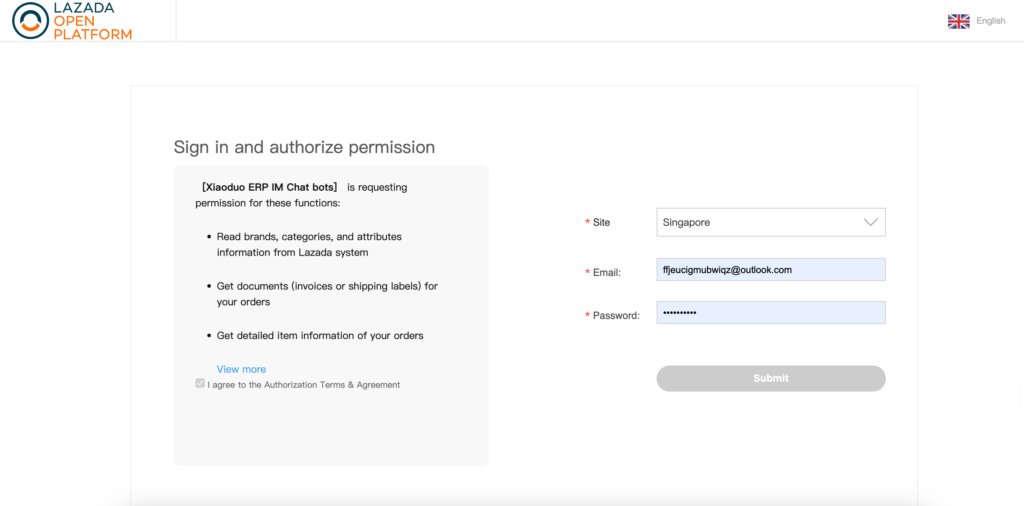
Step 4: Jump to authorization interface of Lazada (taking Lazada as an example) #
- Enter the station number, account and password of platform store and complete authorization
- It will jump to LingChat background automatically after authorization succeeds
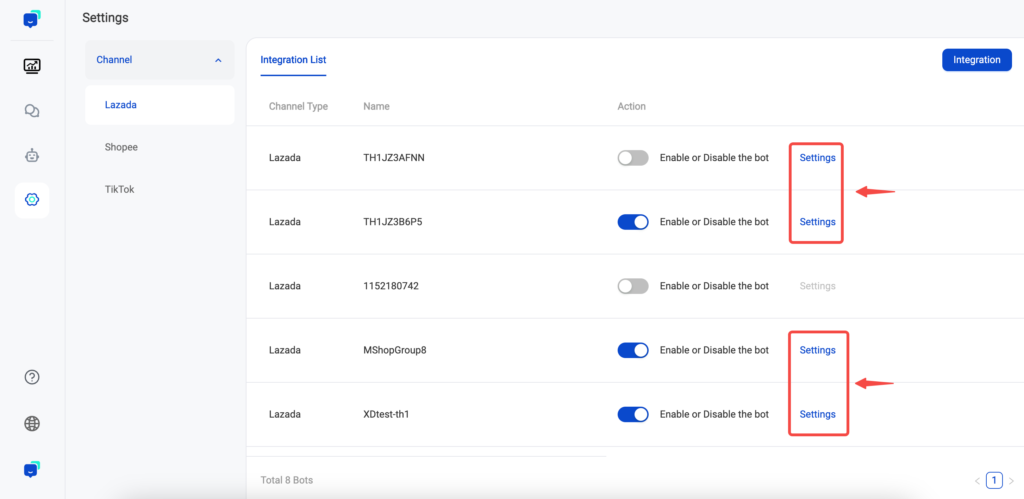
Step 5: Return to LingChat page and the bound stores are displayed in connection list #
- The authorized stores can be found in the list
- Click the right [Settings] button to enter robot management background and configure the robot
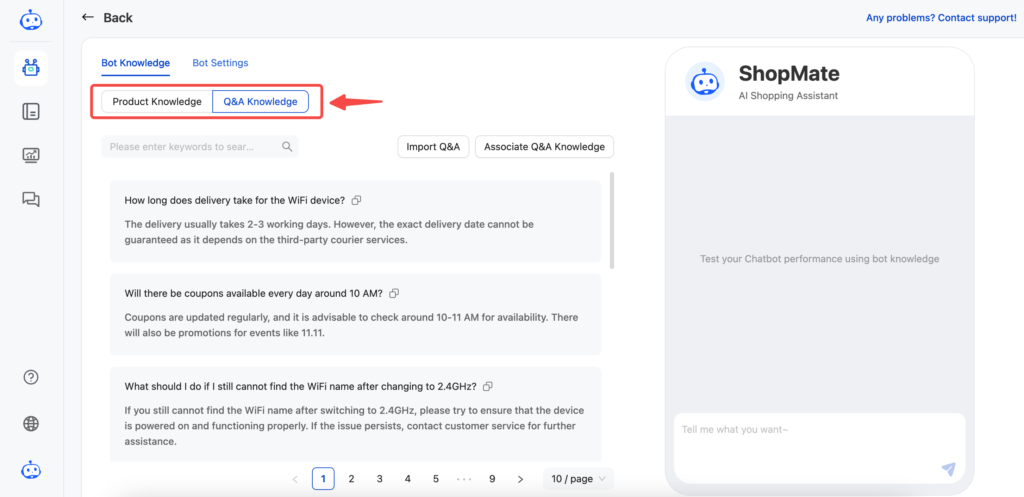
Step 6: Click “Setting” to jump to robot management background page automatically #
- On this page, you can check the commodity knowledge acquired from store and the QA knowledge related to this robot.
- On this page, you can also conduct robot test to verify the robot effects, and then start the production environment.
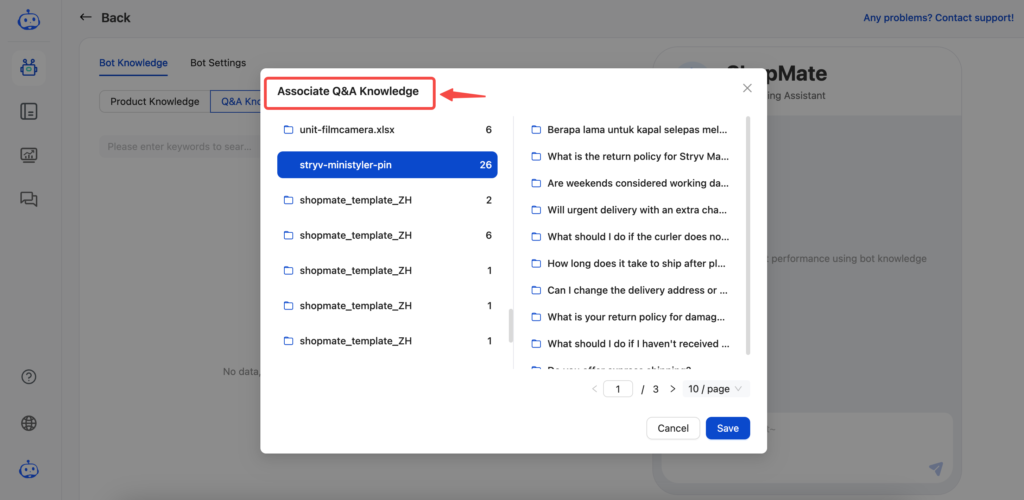
Step 7: After uploading QA knowledge through knowledge base, associate the robot and it can make response based on QA knowledge #
- Download template and import QA knowledge through Excel
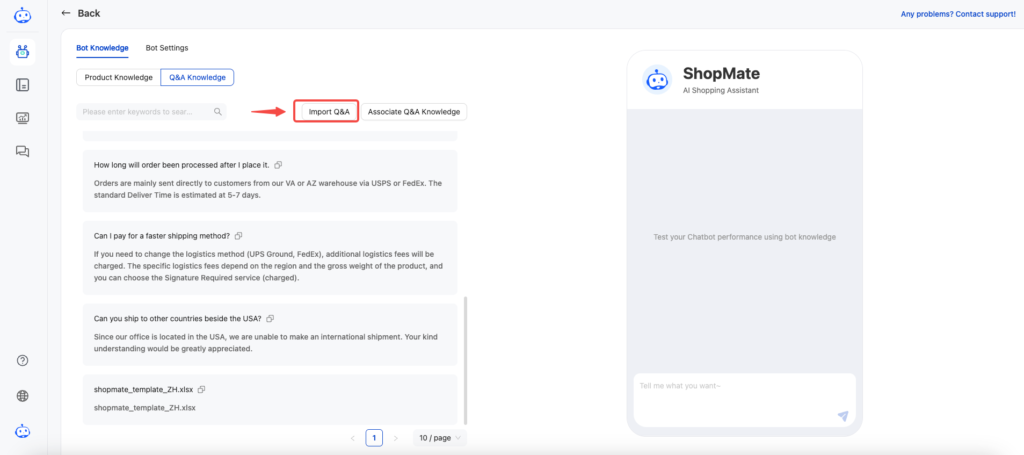
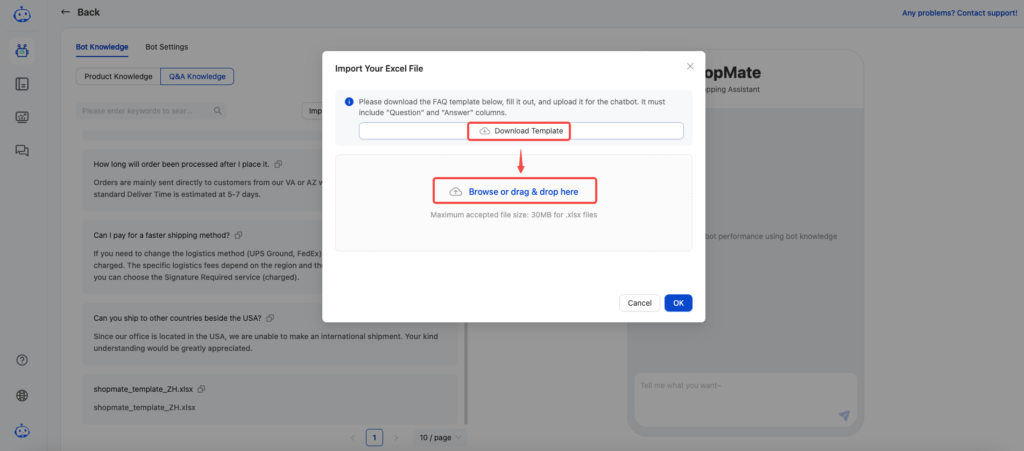
- Associate the imported QA knowledge
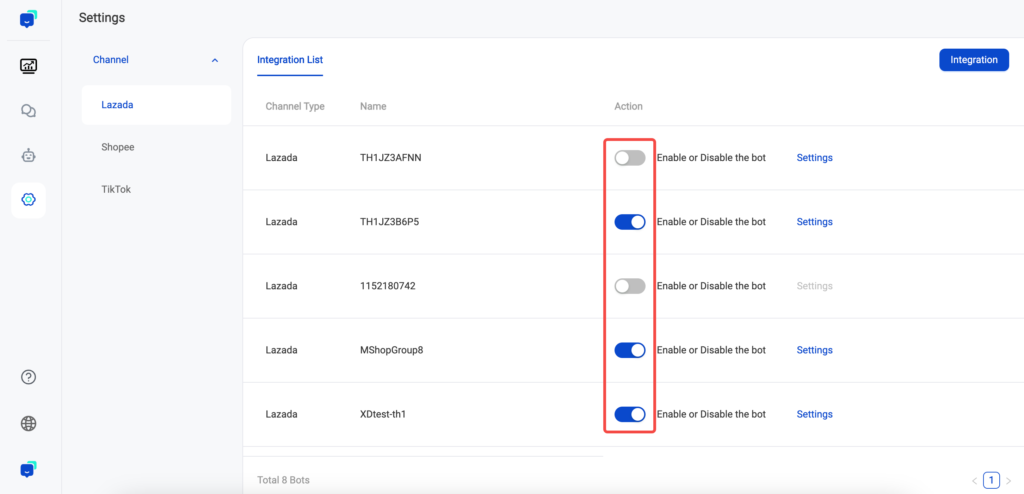
Step 8: Enable/disable robot in LingChat management background #
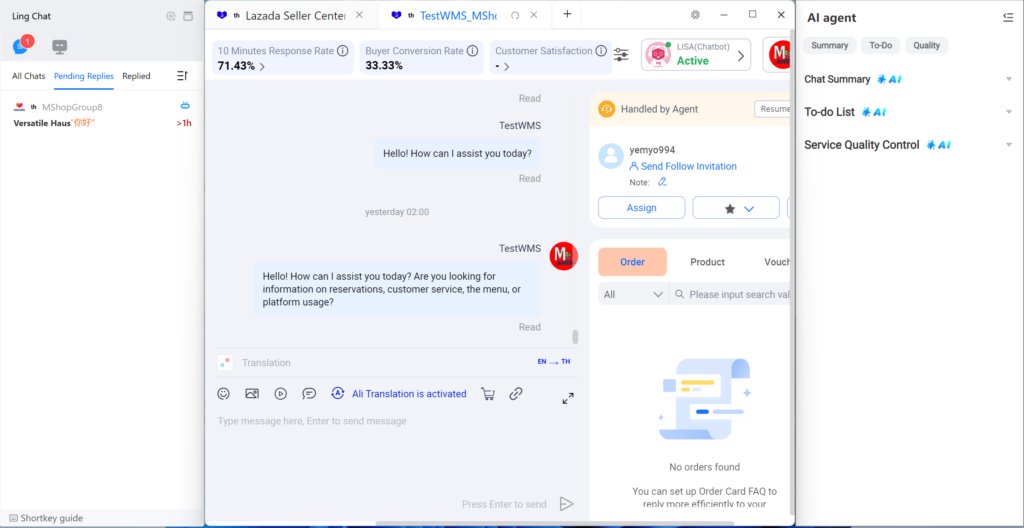
Step 9: Log in LingChat to check robot response effects #
For any question in using LingChat, please feel free to contact us by:
- Question consultancy E-mail:product-rd@3win.ai
- Question consultancy WhatsApp:+66 955018417