Skip to content
EnglishEN
  • 中文ZH
  • Shopify AI Sales

    Solutions

    • Beauty
    • Sports
    • Clothing
    • Grocery
    • Coffee
    • Furniture
    • Pet

    Comparisons

    • ShopMate vs. Tidio
    • ShopMate vs. Crisp
  • Tools
  • Blogs
  • Resources

    Help Center

    编组备份 3Created with Sketch.

    Partner Center

    Learn with Videos

  • About us

ShopMate

8
  • Chat Plugin Installation Steps
  • ShopMate Introduction
  • Quick Start
  • AI Chatbot Capabilities and Q&A Configuration
  • Testing and Optimizing Bot Responses
  • Deploy ShopMate
  • Data Operation and Management
  • FAQs and Support
View Categories
  • Home
  • Help Center

How to configure and enable LingChat robot?

1 min read

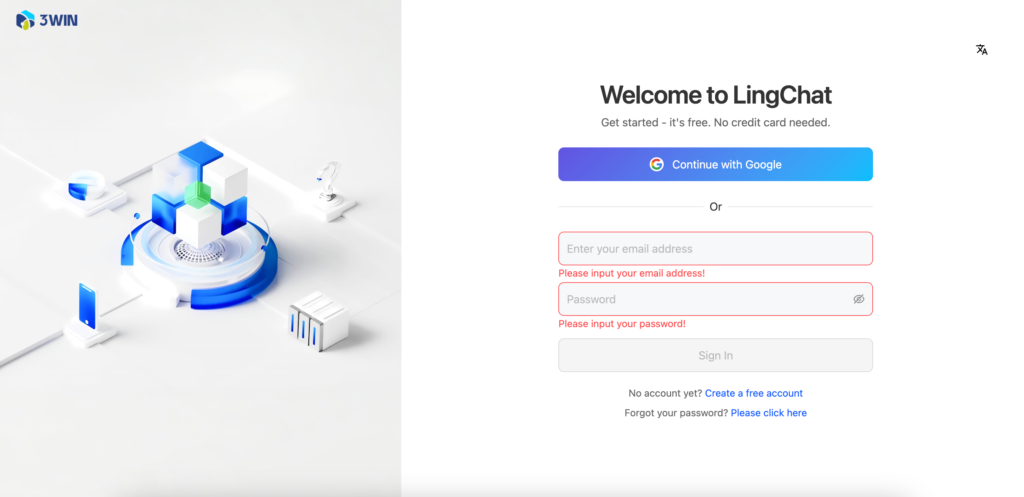
Step 1: Log in webpage LingChat management background #

  • Log in the webpage to authorize store interface and configure the robot

Link:https://lingchat.3win.ai/login
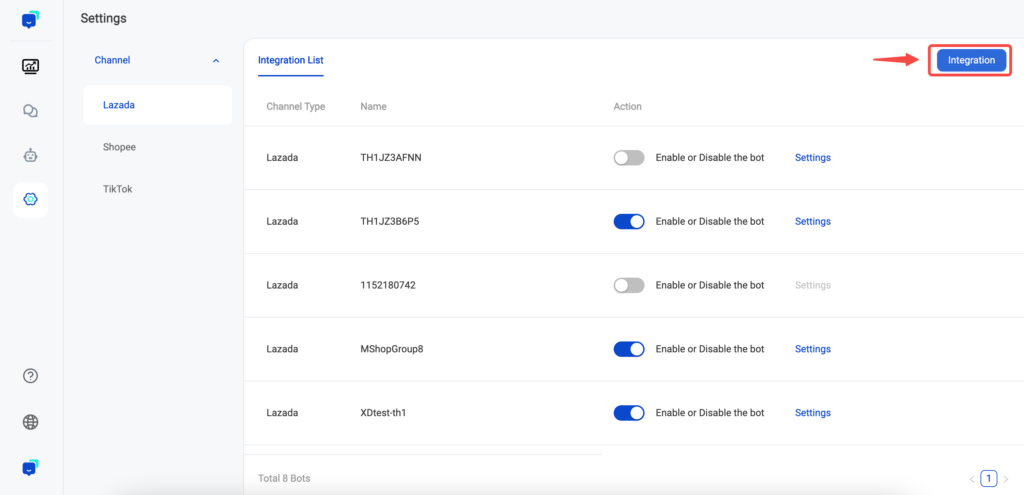
Step 2: Enter setting – channel connection page #
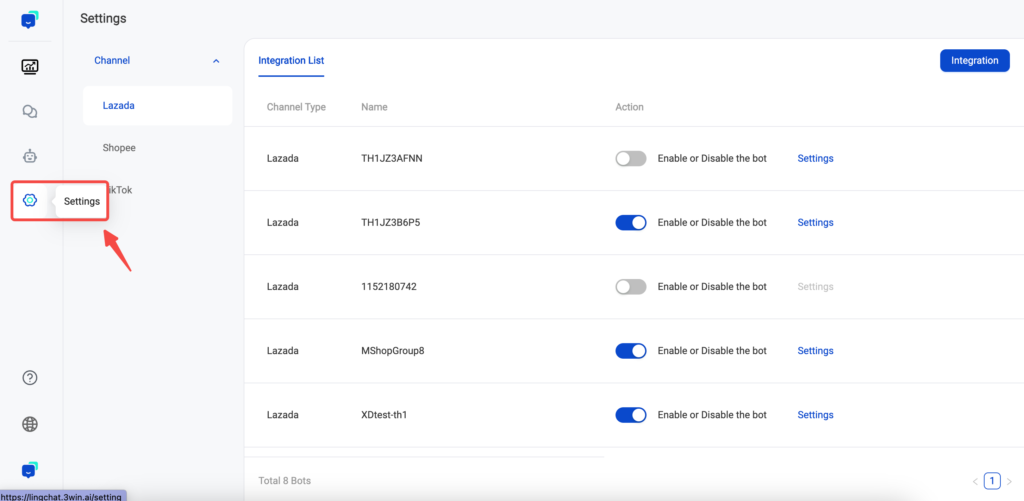
Step 3: Click connection channel #

  • Complete authorization of corresponding robot message interfaces of store
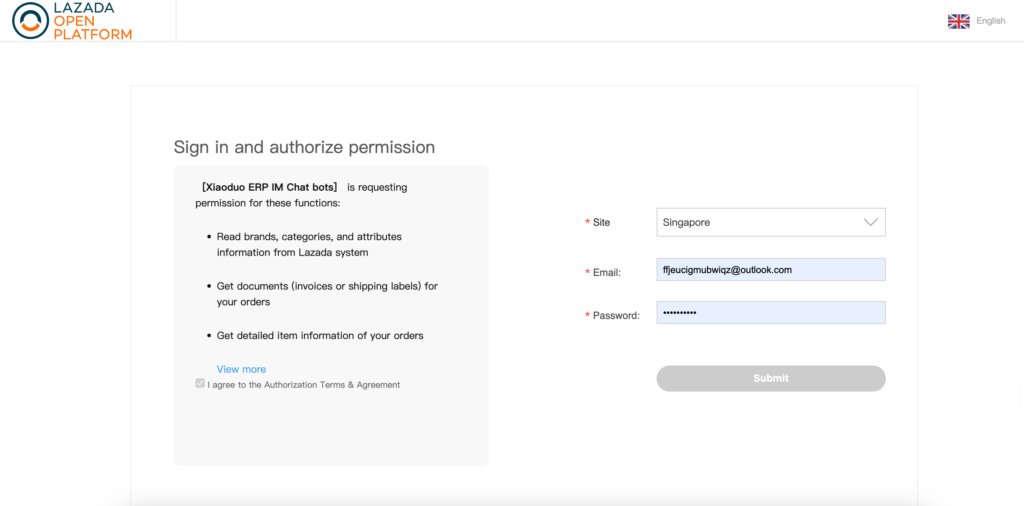
Step 4: Jump to authorization interface of Lazada (taking Lazada as an example) #

  • Enter the station number, account and password of platform store and complete authorization
  • It will jump to LingChat background automatically after authorization succeeds
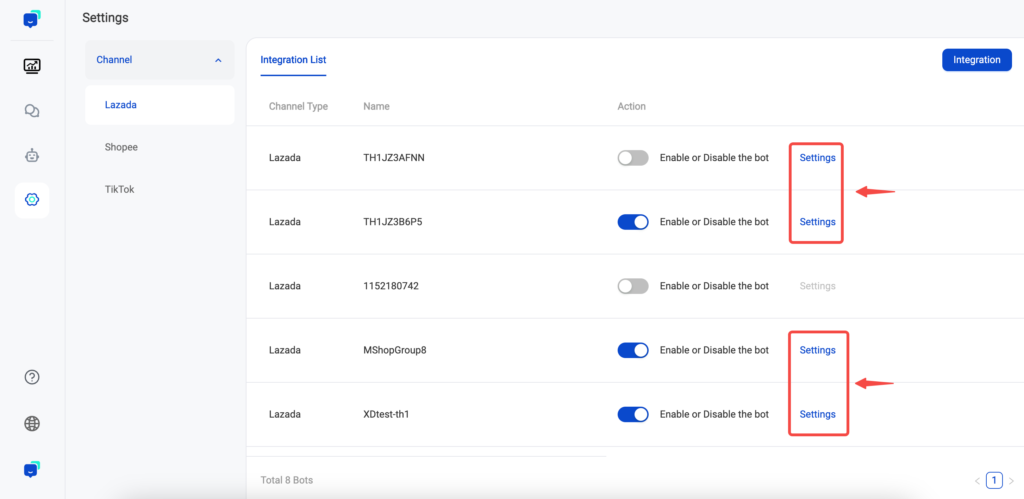
Step 5: Return to LingChat page and the bound stores are displayed in connection list #

  • The authorized stores can be found in the list
  • Click the right [Settings] button to enter robot management background and configure the robot
Step 6: Click “Setting” to jump to robot management background page automatically #

  • On this page, you can check the commodity knowledge acquired from store and the QA knowledge related to this robot.
  • On this page, you can also conduct robot test to verify the robot effects, and then start the production environment.
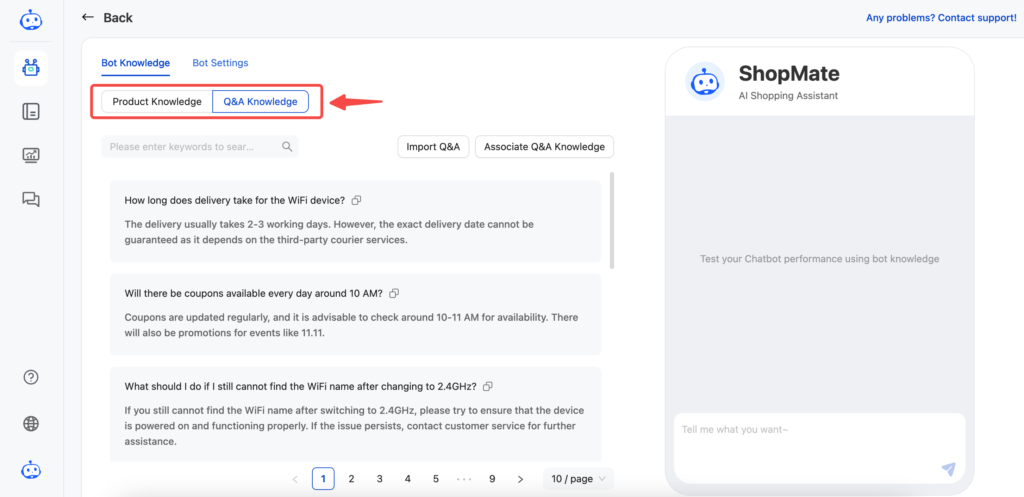
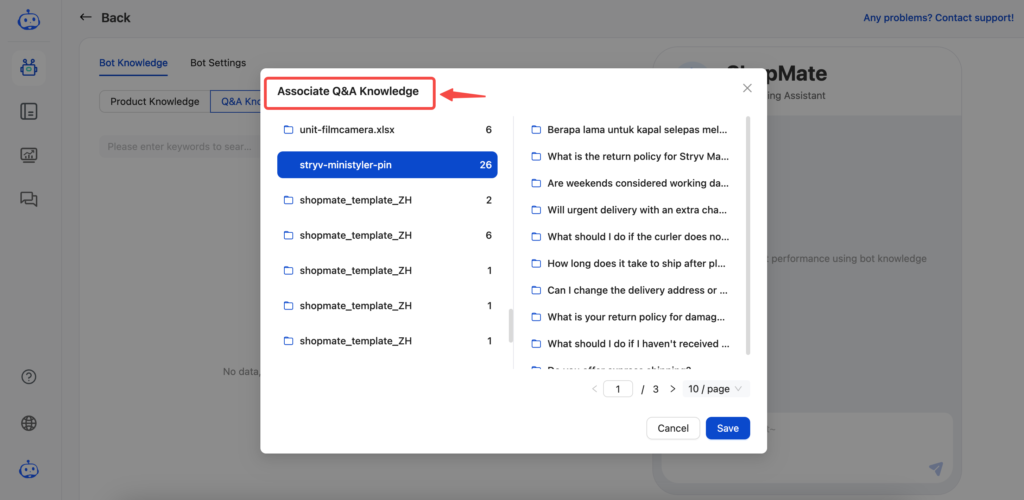
Step 7: After uploading QA knowledge through knowledge base, associate the robot and it can make response based on QA knowledge #

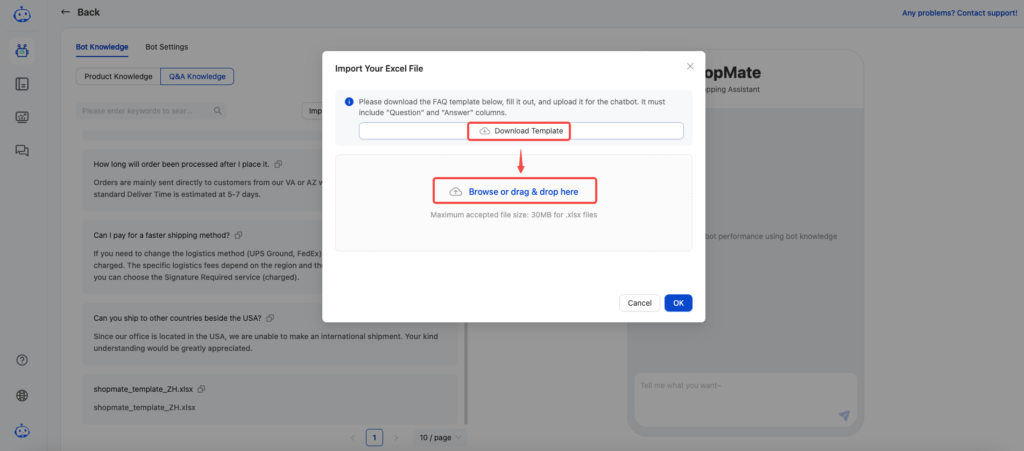
  • Download template and import QA knowledge through Excel
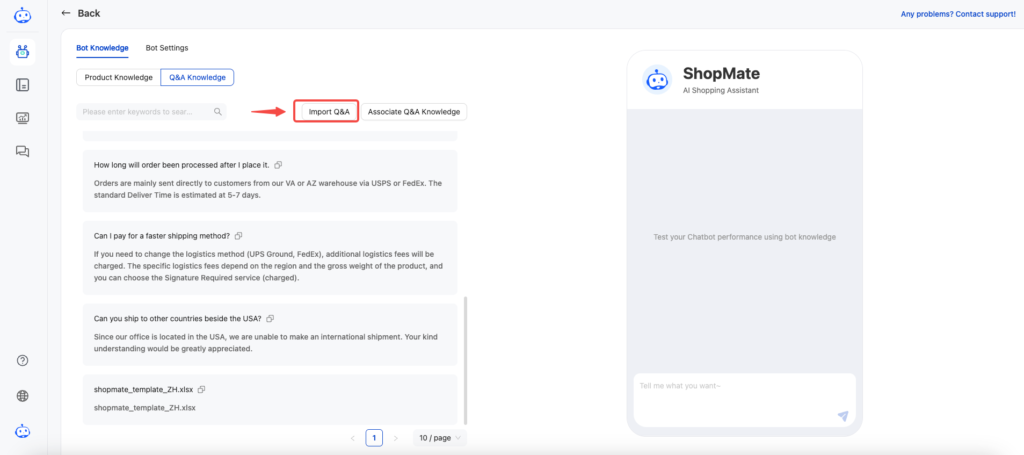
  • Associate the imported QA knowledge

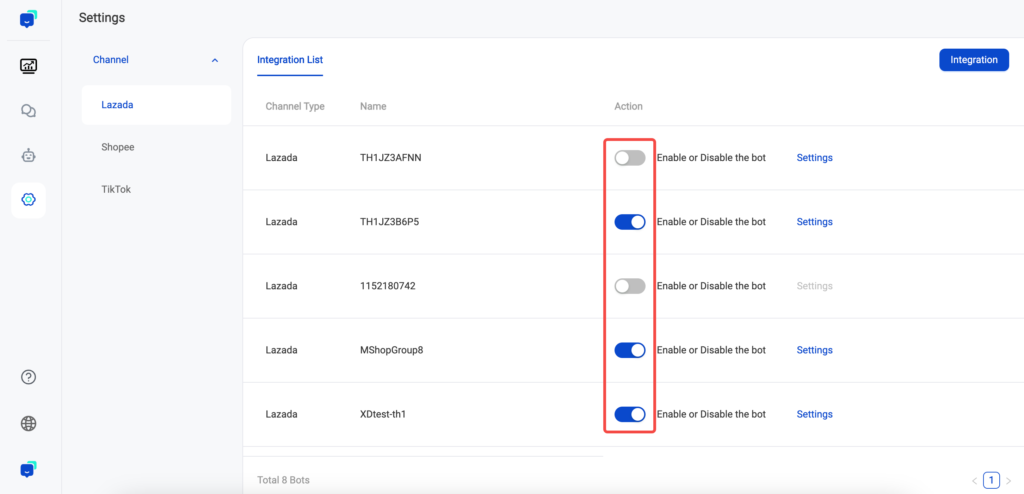
Step 8: Enable/disable robot in LingChat management background #
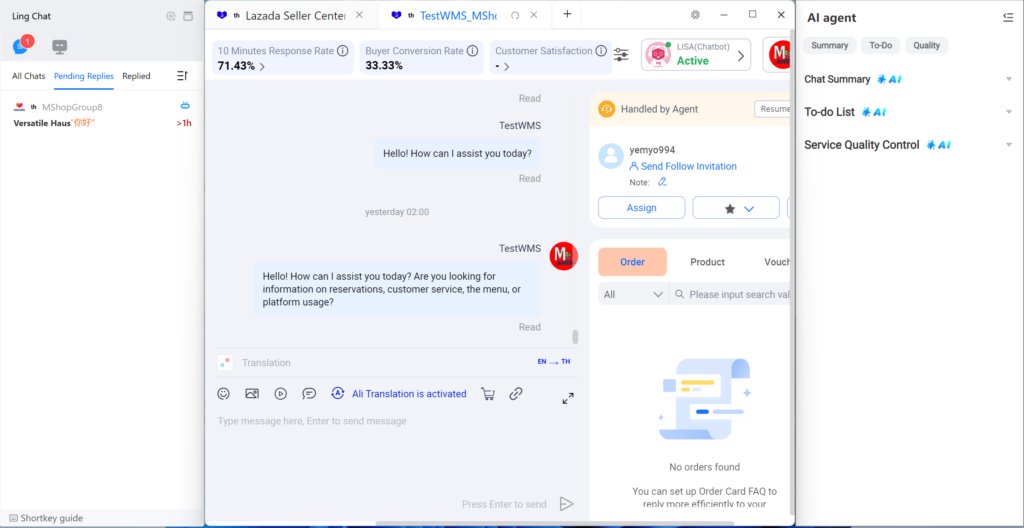
Step 9: Log in LingChat to check robot response effects #
For any question in using LingChat, please feel free to contact us by:

  • Question consultancy E-mail:product-rd@3win.ai
  • Question consultancy WhatsApp:+66 955018417
Updated on June 23, 2025

What are your Feelings

  • Happy
  • Normal
  • Sad
Table of Contents
  • Step 1: Log in webpage LingChat management background
  • Step 2: Enter setting – channel connection page
  • Step 3: Click connection channel
  • Step 4: Jump to authorization interface of Lazada (taking Lazada as an example)
  • Step 5: Return to LingChat page and the bound stores are displayed in connection list
  • Step 6: Click “Setting” to jump to robot management background page automatically
  • Step 7: After uploading QA knowledge through knowledge base, associate the robot and it can make response based on QA knowledge
  • Step 8: Enable/disable robot in LingChat management background
  • Step 9: Log in LingChat to check robot response effects

Empower Business With AI Live Chat For Shopping Guidance & Customer service

Linkedin Youtube X-twitter Facebook Discord

Services

  • ShopMate
  • Shopify AI Chatbot

Our Blog

  • Blog
  • Solutions

Company

  • About us
  • Contact us
  • Customer service
  • Privacy Notice
  • Partner Program
  • Terms & Conditions
EnglishEN
  • 中文ZH