

If you’re a Shopify merchant looking to improve your store’s checkout experience, customizing your Shopify Checkout page is one of the best ways to boost conversions and enhance customer satisfaction. Thanks to Shopify’s flexible customization options, merchants can tailor their checkout process to match their brand, meet customer expectations, and reduce cart abandonment.
In this tutorial, we’ll walk you through the diverse customization options available in Shopify Checkout and show you how to implement them step by step.
Why Customize Your Shopify Checkout?
The checkout page is the final step before a customer completes their purchase. A well-designed checkout can:
- Increase Conversion Rates by making the process smooth and easy
- Build Brand Trust by offering a consistent and professional look
- Reduce Cart Abandonment by simplifying forms and offering relevant incentives
- Offer Personalized Experiences based on customer preferences and location
Step-by-Step Guide to Customize Your Shopify Checkout
Step 1:do a lot of simple checkout customizations
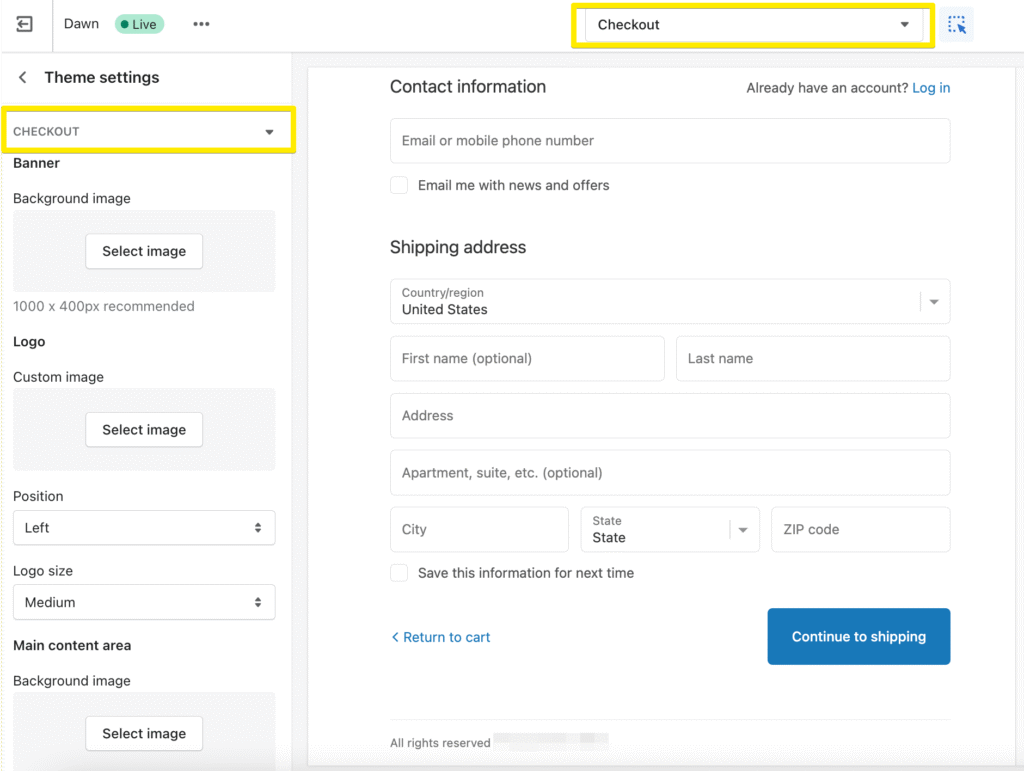
When you click on Customize next to your current theme, choose Checkout in the top menu and go to the Checkout section in Theme settings on the left.
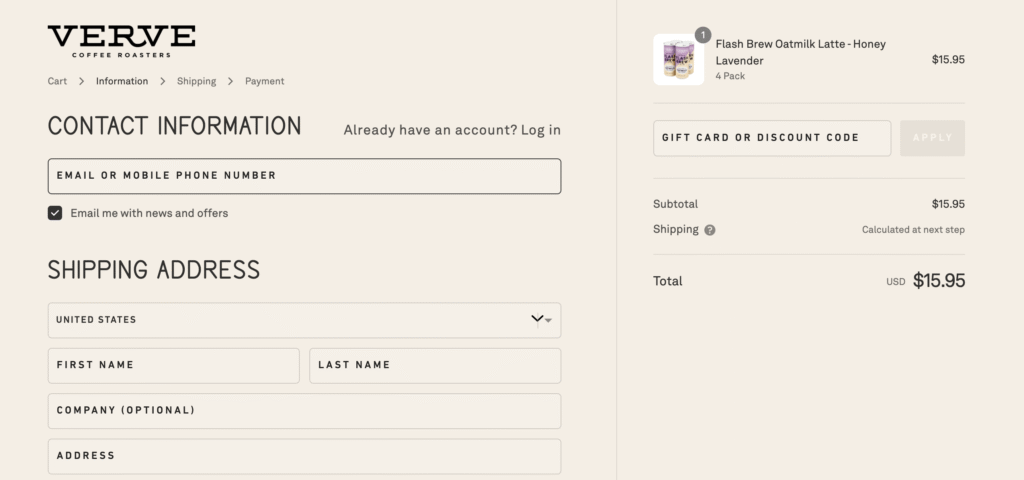
- Add your logo to the checkout page. Your logo should follow the customer from one page to another, creating a consistent brand image. Don’t let your checkout page just show your store’s name—feature a logo instead.
- Modify colors of page sections, text, links, and buttons. Instead of leaving default colors, you can set what fits your brand elements better. You can also set a background image for main page content and order summary, but it’s not a recommended practice—information in these areas should be distinctly visible.
Step 2: personalize the look of the checkout
Shopify provides you with several fonts as well. If you find a suitable one, choose it to personalize the look of the checkout.
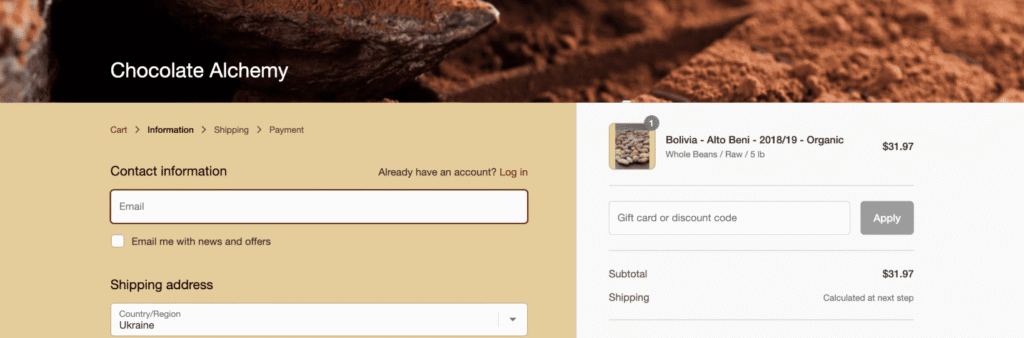
Step 3: Add a branded banner or a relevant image as a header
As little an element an image header is, it can completely change the look of your checkout page.
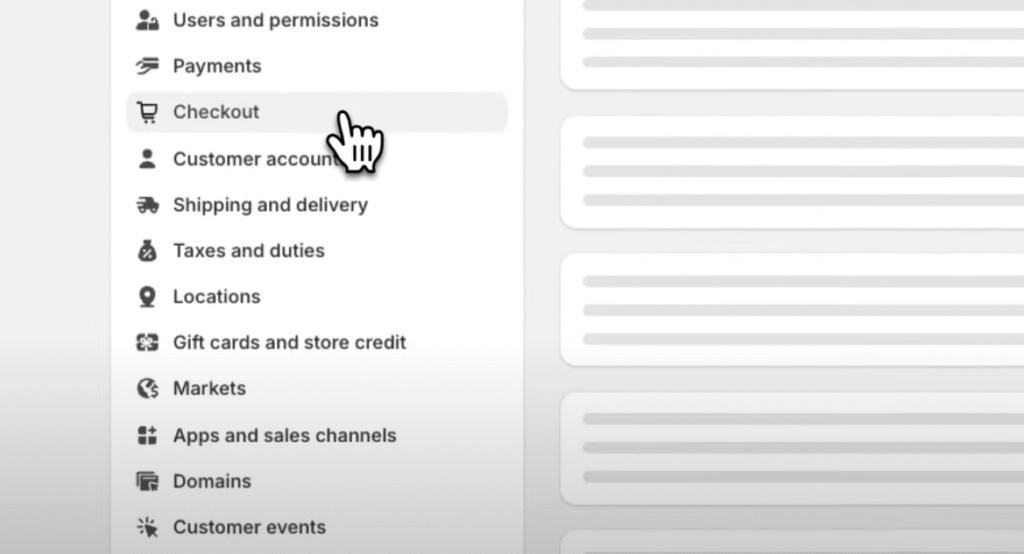
Step 4: Log into Your Shopify Admin
Go to your Shopify dashboard. Navigate to Settings > Checkout.
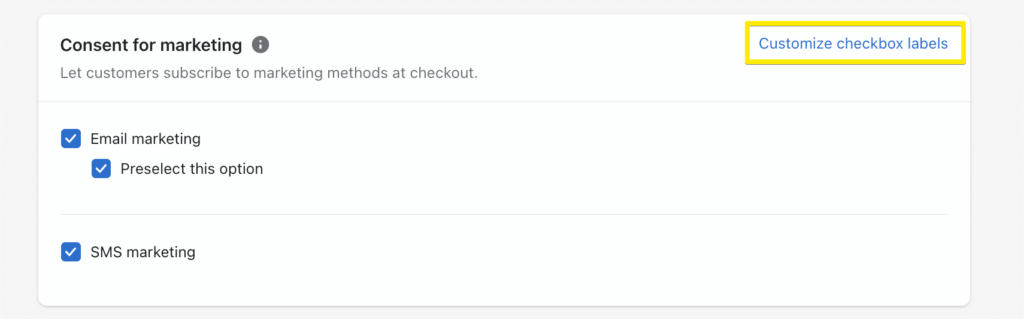
Step 5:Edit marketing signups
You can add email and SMS signups and change the default “Email me with news and offers” to something else. To do the latter, click on the Customize checkbox labels and input your phrases in the respective fields.
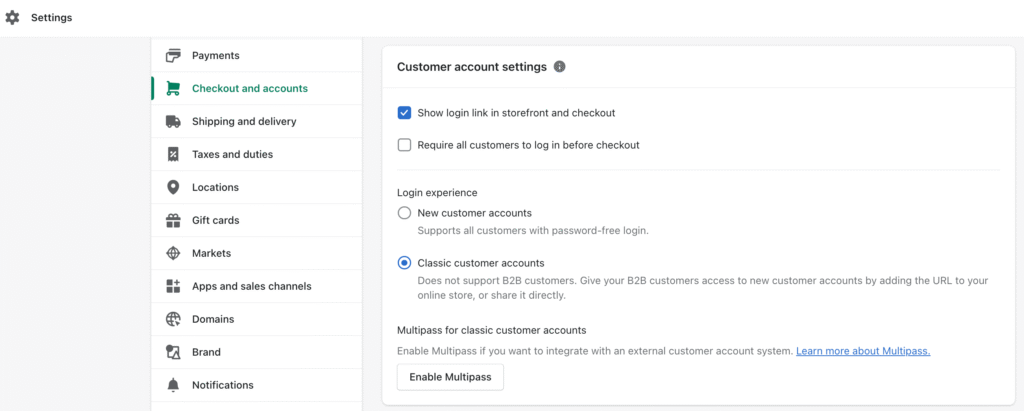
Step 6:Set customer login options and required input fields
In your admin settings, you can determine how visitors can make orders: allow guest checkouts, set Multipass, etc. Plus, you can adjust what content fields are shown as required and which ones are optional.
Step 7:Allow tipping
If it makes sense to your business, you can let customers express appreciation by enabling tipping at the checkout.
Best Practices for Optimizing Checkout Customization
- Keep your checkout clean and simple to avoid overwhelming customers
- Use trust badges near payment fields to increase buyer confidence
- Offer multiple payment options including digital wallets and installment plans
- Localize checkout by adding language and currency support for international customers
Conclusion
Customizing your Shopify Checkout page is a powerful way to create a seamless, branded, and user-friendly buying experience. With Shopify’s diverse customization options—from visual tweaks to advanced extensibility—merchants of all sizes can optimize their checkout flow, reduce cart abandonment, and boost sales.

